| Domein aanvragen |
|---|
| Domein verhuizen |
|---|
| Service |
|---|
| Over ons |
|---|
|
|
||

User guide
OrderingRegistering a domain name
Using your domain name
Managing your domain
Redirecting visitors to your existing homepage
Setting up e-mail forwarding
Connecting your domain name to your existing hosting account
Setting up DNS entries (advanced users)
Registering a domain name -- step-by-step guide
Registering a domain name is an easy and straight forward process.If you are a new customer, the following steps need to be completed:
Check availability
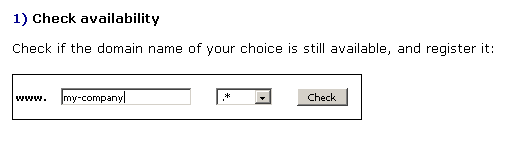
Enter the name you would like to register and press the "check" button to see if the name is still available.
Do not prepend "www" to the name. If you already know which extension you would like to register (e.g. ".com"), you can select the extension from the dropdown list.
Leave it to ".*" to check all common extensions.
Select the domain name you want to register

If the name is still available you can register it by pressing "register" next to the name.
Create a Maxnet account
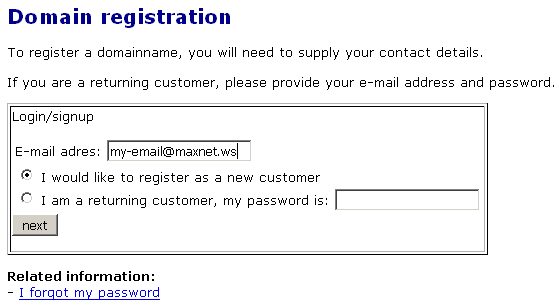
Enter your e-mail address and press the "next" button to create an account.
Enter your address details
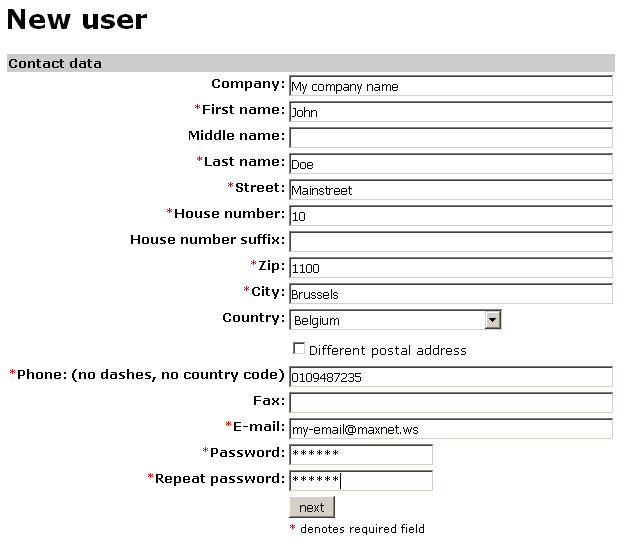
Please enter your address information and the password you would like to use.
Verifying your e-mail address
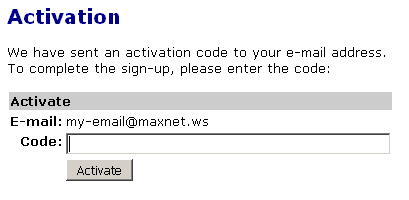
To verify that the e-mail address you supplied is correct, an e-mail will be sent to you with an activation code. Please check your e-mail box and click on the link in the e-mail.
Specifying domain ownership

Now you need to specify information about the contact persons responsible for the domain name. The person labeled as "registrant" is the legal 'owner' of the domain.
- If you are registering the domain name for your own use, the defaults are fine and you can just press "next"
- If you are a webhosting company or webdesigner and are registering the domain on behalf of a client, you usually specify your client as "registrant" and "administrative contact", and select your own company as "technical contact" and "billing contact".
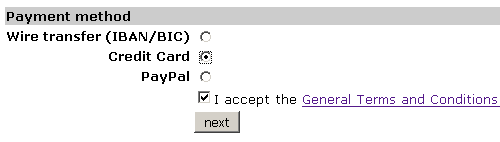
Select the prefered payment method and accept our terms and conditions to finalize your order.
You will receive an e-mail when the domain has been registered. Most domains are registered instantly and are available within minutes. However some domain extensions can take longer and require extra formalities. For .nl and .it domains a paper form needs to be signed and sent back by fax or postal mail to complete the order.
This form can be found on our terms and conditions page and will be provided to you during the order process.
If you pay by credit card, please be aware that full payment will be taken from your card when we have accepted your order.
The debit will appear on your credit card statement as "WWW.MAXNET.EU ENSCHEDE".
Invoicing
Once your order has been processed and the domain has been registered, you will receive notification by e-mail. Attached to this e-mail is an electronic invoice in the .pdf file format. If your organization desires a paper invoice for your administration or tax purposes you can request one by sending an e-mail to our customer support.
Managing your domain
Using the control panel
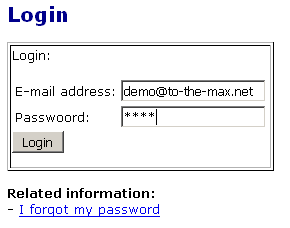
To login to the control panel, click "control panel" and enter your e-mail address and password.
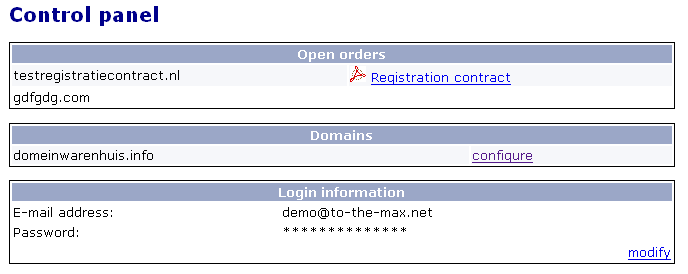
Press "configure" next to the domain name you want to manage.
Redirecting visitors to your existing homepage
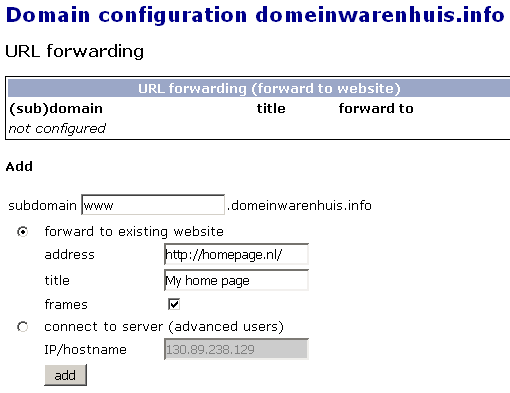
Enter the name of the subdomain (e.g. "www"), the address of your existing website and the title of the main page.
There are two ways of forwarding visitors:
- without frames: when a visitor goes to your domain, he will be redirected to your existing website. In the address bar of his browser (e.g. Internet Explorer) the real address of your existing website will apear.
- with frames: when a visitor goes to your domain, he will also be redirected to your existing website, however the name of your domain will remain in the address bar of his browser. This method is sometimes also called: "url masking", "hidden redirect" or "frame redirect".
Finally press the "add" button.
Setting up e-mail forwarding
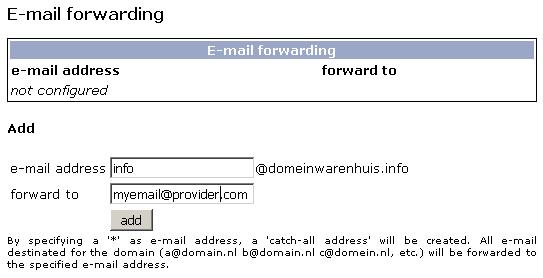
Enter the name of the e-mail address you would like to have, your existing e-mail address and press the "add" button.
Connecting your domain name to your existing hosting account
If you already have a hosting package at a different provider you can connect your domain to it. First request your hosting provider to add the domain name to the configuration of their servers, and ask for the name of their primary and secondary nameserver. This are the systems responsible for associating domain names with computer systems (IP-addresses).
Then go to our control panel, click on "configure" next to the domain name and select "change nameservers".
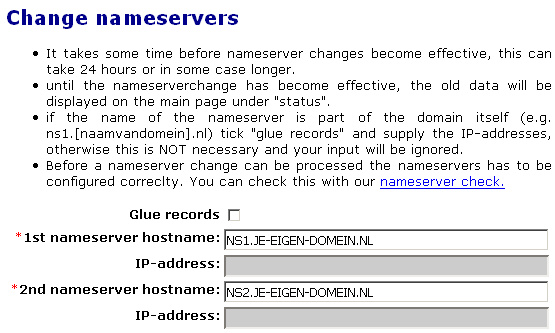
Now enter the primary and secondary nameservers and press the "change" button. This will delegate the technical control of the domain to their systems. The administrative part (including billing) will remain with us.
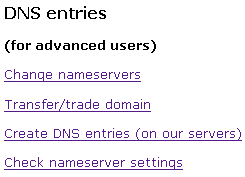
Setting up DNS entries (advanced users)
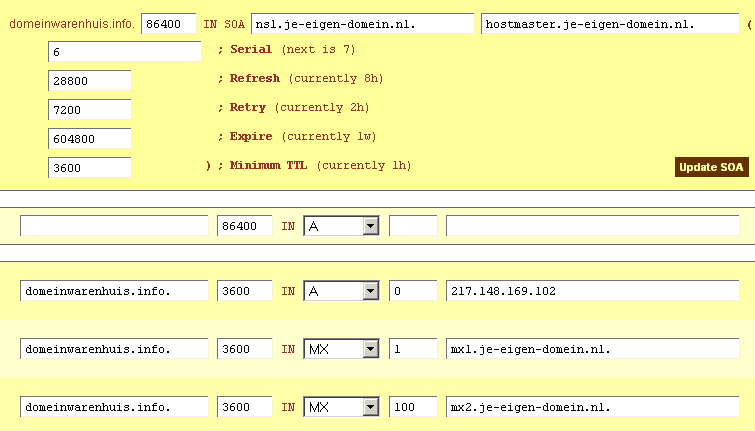
You can create DNS entries on our nameservers, by clicking on "Create DNS entries (on our servers)". This is for experienced users only. Most users do not need this option.